Analog Tape Slap Back Tutorial

Using a reel to reel tape machine to add vintage vibe to your recording

I recently did a session with the Ohio based group Manic Sandwich. After two long days of tracking, we had enough material for a six song EP. When time came to mix the project, the band was clear on one thing: they wanted as much slap back as they could get!

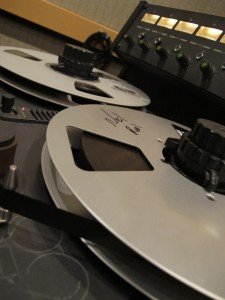
I messed around with various tape delay units and plugins, but ultimately decided this mix would be a great chance to print some real tape slap back, using a tape machine. Since this mix was going to be a console mix anyway, why not generate some delay out of the box as well? The mixing was done on a Trident 80B console, and I used an 8 track Otari mx5050 for the slap. I tried my best to document what I was doing for a quick “analog tape slap back tutorial” here!

The set up

This type of effect is commonly used on vocals. I did this on a few tracks, and was quite pleased with the results. However, I found one song where it worked really well on drums. This is the set up I will be reviewing here.

To start with, I bussed the snare, toms, over heads, and hi hat to an unused stereo output in protools. I decided not to include the kick drum, as the extra low end would muddy up the mix. On the patch bay, this stereo send was routed to the tape machine input. From the tape machine output, the signal was routed through a Vintech Dual 72 and into the line inputs of the Trident board. So, here we have the signal chain:

ProTools drum mix –> Otari MX 5050 –> Vintech Dual 72 –> Trident 80B –> ProTools stereo input

note: the Dual 72 was used for extra coloration/saturation of the drum signal from the tape. The Trident channels were used for EQ’ing.

The three heads: erase, record, and playback

How it works

On the typical professional tape recorder, there are three heads: erase, record, and playback. When recording a signal while monitoring off the playback head, there is a brief time difference between the actual recording and the listening. This is a result of the physical distance between the record and playback head. Generally, you wouldn’t notice this during normal tracking, only if you had a consistant playback source.

So when looking at my signal chain above, I used the first two inputs on the Otari to record the drums onto tape. As you can see in the picture below, these two channels were set to “Input”, and are record ready. However, I am monitoring off the playback (repro) head. By changing the tape speed, I am effectively changing the distance between the two heads. For example, a fast tape speed (15 ips) would result in a shorter delay effect, while at a slower tape speed (7.5 ips) the slap back effect would be more pronounced. This machine also has a varispeed control for fine tuning.

It is important to remember that this only works when you are actually recording the signal onto tape. Otherwise, there would be no delay – just a straight doubling of your input source. With this kind of set up, you are fairly limited in your echo time options. In some scenarios, using a plugin is much easier, because the proper tempo can be set right away. Using a tape machine requires more fine tuning and can be a bit of a headache. In my own experiences, I have had the best results using this effect on slower songs that are open, giving the effect room to breathe.

Although I am not sure who actually discovered this, I am of the opinion that tape delay was originally discovered on accident. Some engineer in the 50’s was messing around with a tape machine and realized that the delay effect produced sounds really cool. The rest, of course, is rock n roll history.

Sound Samples

To check out the song I have been referring to in this tutorial, click the link below (this is a premastered version of the mix).

Producer’s Toolkit: 7 Items to Bring to Every Session

When starting a session, its never a bad idea to be a bit over-prepared. Overcoming minor roadblocks and hitches, especially early on, will get things off to a good start. The following items have come in extremely handy for me numerous times (particularly when working at a studio that is unfamiliar).

Producers Toolkit:

1. Harddrive – Kind of obvious, but having a reliable backup drive is crucial. My professor in college always told us in regards to the digital domain “If it doesn’t exist in two places, it doesn’t exist at all”. Taken with a grain of salt, but you never know when the session drive is going to crap out or files get misplaced etc. Also comes in handy if you are mixing a project from home or working in different locations.

2. Pencil and Paper – Keeping good notes will help you out in the long run. Many artists will spout out ideas and have no idea what they said an hour later, so its good to have a reference to come back to. Jotting down mixing ideas, documenting external device settings, or just listing potential overdubs is stuff to stay on top of.

3. Headphones – any respectable studio will have decent headphones. However, its convenient to have an extra pair you are familiar with. This will be an advantage when you are doing critical EQing, auditioning microphones, or simply getting the headphone mix together for the band.

4. Drum Key – These are extremely easy to misplace. Instead of spending a half hour looking for it in the studio equipment room, keep one in your bag.

5. Guitar related items – Although technically the respobsibility of the performers, it is good to have extras. Tuner (with batteries), spare set of strings, 9v adapter and picks. Simple things like this can stall a session out of nowhere, so being able to replace them on the fly can save the day.

6. Flashlight – Comes in very useful when placing mics on guitar cabinets or crawling around behind consoles and outboard gear racks.

7. Blank CDs/DVDs – At the end of the session give the artist a rough mix of the days work.

Bonus – Laptop – This is not as important as the others, but can also come in handy. Possible uses are playing back mixes, auditioning sounds, and finding out where to eat lunch.

Squash! How to use a Compressor

The common features of dynamics processors explained

When used properly, compression can greatly add to the overall feel of a song. Recorded tracks are clearer, louder, and sit better within the context of the recording as a whole. However, misuse can result in distortion, lack of dynamic range, and an unexciting recording. Lets take a look at how a compressor works.

A compressor reduces input levels that exceed a selected threshold by a specified amount. This reduced dynamic range signal can then be boosted in level at the output, thereby allowing the softer signals to be raised above other program or background sounds. (Huber, Modern Recording Techniques)

Now that we got the textbook definition out of the way, lets look at this tool in real terms. As a dynamics processor, a compressor will “squeeze” together the dynamics (loudness/softness) of an inputed source. Basically, you are taking a sound and gently pushing it into a denser waveform. In effect, this will tame louder signals while making softer sections more audible. Any part of the signal entering the compressor above a certain level, or threshold, will be proportionately reduced to a lesser volume.

Since the loudest portions of the source material will now be turned down, it is possible to boost the entire level of the signal. In other words, since the dynamics have been reduced as a whole, the signal can now be amplified. The loud signals are still prominent, but the softer signals are much more present as well.

Most dynamic processors and compressors have a similar set of parameters. Here they are with a basic explanation of how to use the controls on a compressor:

Input Gain – how much signal is fed to the compressor

Threshold – this is the cut off level that initiates gain reduction. Signals that enter above this level will be attenuated according to the ratio, while signals that enter below will remain untouched. Some units may not have a threshold knob. With these, the input gain level controls the threshold – the higher the input gain, the lower the threshold level.

Ratio – the amount of attenuation. For example, a 3:1 ratio means that for every 3-dB of input signal over the threshold level, only 1-dB will be output. Generally speaking, ratios between 2:1 and 4:1 are considered “light” compression, while anything over 10:1 can be considered “heavy compression or “limiting”. A ratio of infinite:1 (“all buttons in” on an 1176) means only one 1-dB of signals above the threshold will pass to the output stage, no matter how high the input signal. Think of ratio as an input/output gain reduction ratio.

Attack – this controls how quickly the compressor responds to incoming signals that exceed the threshold level. For example, a fast attack time is ideal for sounds that have sharp and quick peaks – like a snare drum or hi-hat. In contrast, instruments such as acoustic guitar or bass have a longer sustain time, and may work better with slower attack settings. With a really fast attack, it is possible to actually hear the compressor kick in, causing a “pumping” sound.

Release – pretty much the opposite of the attack setting, release controls how long the compressor holds on to (stop compressing) a signal after it has fallen below the threshold range. As with attack, you have to experiment with this control to a find the most transparent setting. A quick release time may cause too fast of changes in dynamics, while too long of a release time could steal too many dynamics from the track.

Output/Make-up Gain – sets the level at which the reduced signal enters the mix. Use this to literally “make up” for the amount of gain reduction that has happened in the previous stages.

It is a well known fact: over compression will suck the life out of your signal. Transient peaks and some changes in dynamics breathe variety and flavor into your tracks. Think of compression as a tool to control dynamic range of a signal, but not eliminate it completely. This is why it is important to understand the above list of features. With this being said, trust your ears and remember that using compression is a compromise between your original and processed signal.

Dither Explained

At first glance, dithering may seem like an extremely complicated mathematical equation. It is beyond the scope of this article to delve into scrutinizing detail concerning dither. However, as a necessary part of digital recording, it is important for audio engineers to have a basic grasp on dither.

Anyone who has spent some time in the realm of digital audio has probably encountered dither in some form or another. You may have noticed it as a part of limiter plug ins or other mastering related effects. Here’s the low down on what dither will actually do for you:

Dither Explained:

As mentioned above, dithering is absolutely necessary in digital recording. Whereas analog recording theoretically has an infinite resolution, digital audio works in discrete but quantifiable steps. When working with high bit rates in the digital world, you eventually need to down convert. The classic example of this is converting a session recorded at 24 bits to 16 bits for a CD. Whenever a high resolution signal is reduced in resolution, quantization errors will be introduced into the signal. The signal is now truncated – this means artifacts and digital distortion (the bad kind). This is where dithering comes in.

So what exactly is dither? Believe it or not, it is a very low level random noise. This white noise is undetectable under the music or whatever is happening on the track. Introducing this into the signal will improve the resolution of the conversion process down to the lowest bit level. It will also greatly reduce distortion and peaks in a way that aids the final signals performance. Although it sounds counter-intuitive, adding white noise to a truncated digital audio signal will produce a much more pleasing and natural result.

When to use Dither:

  • When mixing at a higher sample rate and outputting at a lower resolution rate (48 bit to 24 bit, 24 bit to 16 bit; see CD example above)
  • Converting resolution for “high definition” audio plugins (ie: converting 24 bit signal to be processed at 48 bit then converted back to 24 bit again)
  • Analog tape to digital conversion. The analog signal has an infinite resolution, but will need to be down converted when imported into a 16 or 24 bit session. This form of dither happens naturally via tape noise/hiss in addition to the converters internal thermal noise.

I have always been taught to apply dither at the final stage of production, and to only do it once. Typically, this will be during the mastering process when the master CD is made for duplication.

For an in depth look at dither, I suggest the following reading: http://www.users.qwest.net/~volt42/cadenzarecording/DitherExplained.pdf

Parametric EQ vs Graphic EQ

Differences between the two most common forms of equalization

As probably the most common for of signal processing, EQ is an essential engineering tool. For new comers to audio, the concept of “EQing” can be a bit overwhelming. As with most things in our industry, you get better at it over time (as your ears develop).

So what is equalization? Basically, it is a tool that lets us control the relative amplitude of particular frequencies found in the audible bandwidth. To put it more simply, EQ allows us to boost or attenuate different tones in a recorded sound. There are many good reasons to use EQ, but there are also just as many not to. In many cases, it boils down to a stylistic thing – some engineers favor equalization during tracking, some do not. For me, starting with a strong performance, good mic placement and a good musician are key. EQ only comes into play if necessary.

Some reasons to uses EQ:

– flatten frequency response of a particular mic

– correct specific problems in a recording

– alter sounds for creative reasons

– blend together contrasting sounds

Reasons not to use EQ:

– easy to get carried away, reducing decent sounds to something worse

– no effects can fix a bad recording

Parametric EQ:

Based around certain parameters, this EQ lets you alter certain frequencies with variable bandwidth and gain. Although models vary, typical designs revolve around variable center frequencies.

This type of EQ is common on many popular recording consoles, as well as being the standard EQ in many major DAW’s. One of the great features of parametric equalization is precise (surgical) cuts or boosts in any frequency without effecting other frequencies. In fact they often overlap.

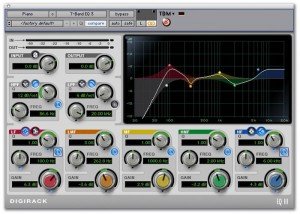
ProTools Parametric EQ (notice the overlapping frequencies)

Graphic EQ:

Although perhaps not as common on consoles anymore, this type of EQ is very popular in live sound. A graphic EQ allows you to cut or boost levels on equally spaced frequencies (ie. octave). These are usually identifiable by a slew of vertical sliders which theoretically give an overall readout of the frequency response curve.

Graphics are generally found in live sound for feedback control. If using enough bands, it is easy to notch out undesirable frequencies (ex: 60 hz electrical hum). Many popular computer applications, such as iTunes, use a digital graphic EQ for the user to shape the sound.

31 Band Graphic EQ

Which EQ is the right one for the job? That depends on the occasion and personal preference. Generally speaking, parametric EQ has a higher learning curve and can cause more extreme changes in the sound. A graphic EQ is more visual and easier to understand right away. Again, a good practice for audio younglings would be to focus on getting good sounds before you try to change them with equalization or other effects. There are no real short cuts here – it just takes a little time.

Click Track: Is it Right for Your Session?

Popular Click Track Myths Examined

One of the first points addressed in any session is the click track. Many musicians believe that using a metronome during recording immediately results in a stiff track with no breathing room. Engineers often favor click tracks because it makes editing and overdubbing much easier. Click tracks are an invaluable tool, but sometimes they are not right.

As mentioned earlier, a common mentality among musicians (especially younger ones) is that using a metronome will result in robotic performance with no emotion or energy. This is the wrong mindset. The truth is that no performance will ever be “perfectly” on time. The purpose of the metronome is simply to provide a rhythmic boundary for the group and prevent the drums from varying in tempo. Any good drummer will be able to work within these bounds and still “groove”.

Recordings done with a click track should end up sounding just as natural as any other recording. If the drummer can groove and the band has a good pocket, this group will have no problem following a metronome. If a drummer refuses to use a click track simply based on the argument that it will “sound robotic”, I interpret this to mean they do no practice enough. For me, I believe a drummers job is to keep the time – if you can’t do this you should probably start practicing! I would guess that a huge majority of the songs played on the radio in the past couple decades has been recorded with a click track – enough reason for most people to realize that click track recordings are the way to go.

However, a click track is not always a good idea. Some examples include songs with multiple time signatures, live recordings with no overdubs, orchestral recordings, inexperienced groups who simply cant perform to a click, and bands so good they do not need one (unlikely). A click track does not mean the performance will automatically be awesome. In most scenarios, I feel it definitely does help glue together a performance, but there are some cases in which a metronome will negatively effect the performance. The most common is when a drummer is speeding up, realizes they have lost the tempo, then slow down to catch it again. This wavering of the tempo results in a super unprofessional sounding recording, and should be avoided. Another example of this could be if a band is significantly altering their performance to accommodate a click track.

If any type of overdubbing is part of the session, it is foolish to not use a click track. This is especially true for songs that have breaks where instruments (drums in particular) drop out. Having a click guide for this type of stuff is like night and day. On this note, it is important to not force a click on a band just because it makes it easier to “protools” a mix later on. The decision to use a click should solely take into account improvements in the music – of course it doesn’t hurt to mention ease of overdubbing in most scenarios.

Generally speaking, I think almost all bands will benefit from click track recording. When used properly, it will increase the tight-factor of any song while doing wonders for intensity and build of a track. As we talked about, however, it is not always right. I like to consider these points for any session I am doing and then decide whether or not a click track is the right choice for the session.

TOTM Studio Invasion

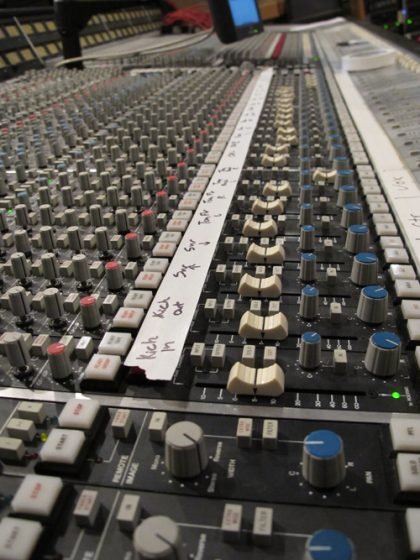
SSL Console in the ‘A’ room at Engine Studio

The new Tribe of the Mountain album has been in the planning process for a while now. With an open week at Engine Studio in Chicago, we finally got the go-ahead to begin the recording process. Four days (70 hours of which were spent in the studio), things have gotten off to a great start. Basic tracking is done: we have drums, bass, guitar, and even some vocals for all ten songs. Now begins the overdubbing stage…

This recording session has provided me with a lot of good material to share on this blog. I still need to go through a lot of it, but expect more to come very soon!

5 Great Browser Apps for Making Music

Online Music Production with Beat Making Software

Pop music has always been driven by a strong rhythmic feel. People gotta dance! However, heavy rhythm does not need to only be associated with pop music – it is indeed prevalent in most forms of music.

In the early days of beat production, sounds were sampled from a plethora of sources. They were cut together on tape to form the rhythm. After this, hardware sequencers with MIDI functionality came into play. Today, a combination of these old school techniques are used, in addition to the latest software.

In fact, it is quiet easy to make beats entirely in the box (using only software). Most of the popular digital audio workstations today – ProTools, Logic, Cubase, Garageband – all have the capability to work with MIDI (a protocol that allows electronic music instruments, computers, samplers, etc to communicate with each other). In addition, there is an abundance of dedicated beat making software available. Some popular names are Reason and Fruity Loops. Through use of virtual instruments, samplers, signal processors, and mixers, there is essentially an unlimited variety of sounds that can be produced with beat making software.

It is interesting to note that in many pop music cases, the artist is not the one coming up with the “beat”. Usually someone else is hired on, or the producer creates the beats. This is a fairly new and unique niche. People who are good at producing these beats make a lot of money. If you are interested in producing music, especially in the hip hop and pop genres, then being able to work with beat making software is vital – this will make you an extreme asset in the studio.

If you are just getting started with this, or if you are looking for some fun, there are many ways to make beats online. Here are just a few options:

(Click images for link to site)


1. ToneMatrix

  • a simple sinewave synth with a 16 step sequencer.

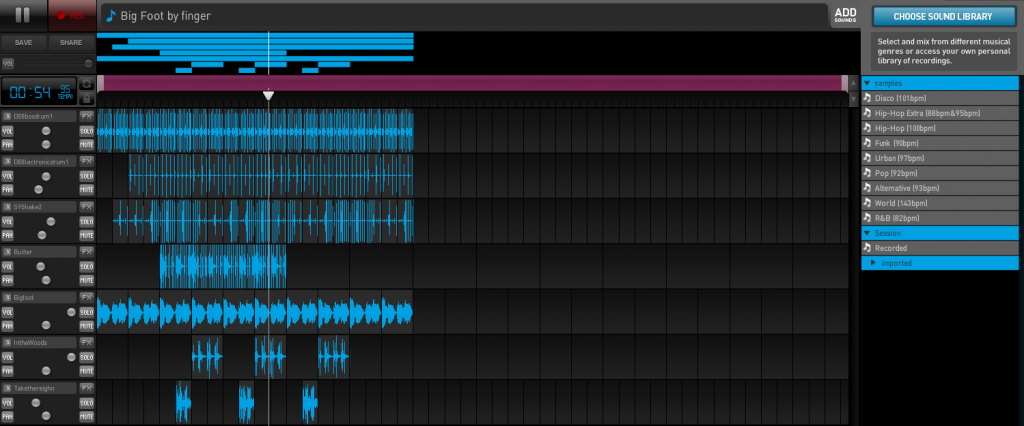
2. Audiotool

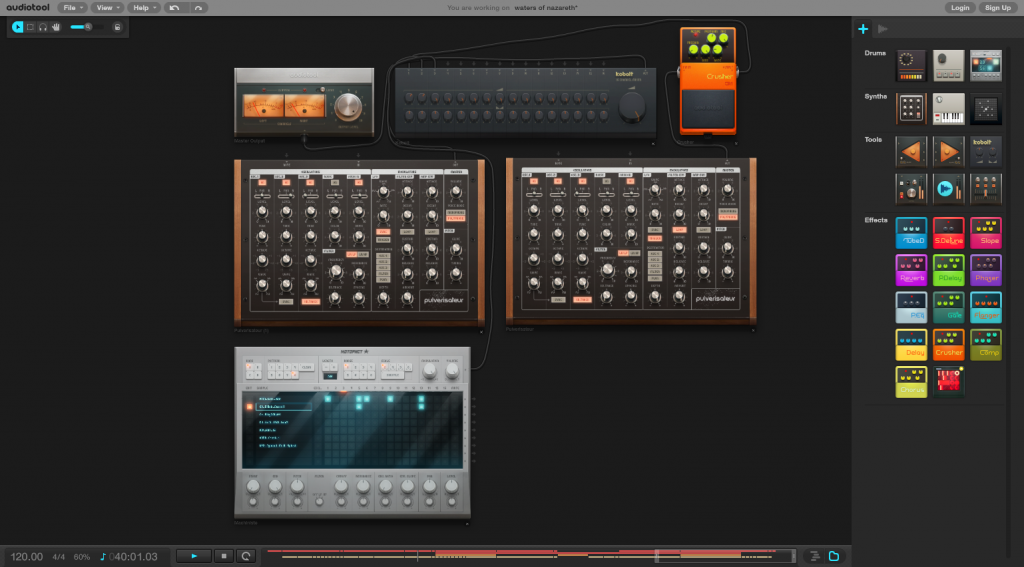
  • this is definitely one of the most advanced browser based workstations. Although it takes some time to learn, the interface is great and produces quality results. A fast internet connection is a must!

3. Loop Labs

  • many different virtual “studios”, each optimized for creating a different type of music. Fairly intuitive and lots of fun, but also requires a good internet connection.

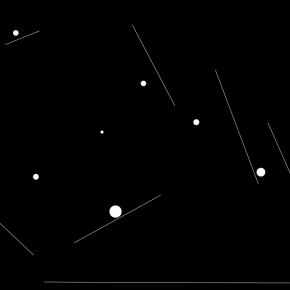
4. Ball Droppings

  • not a traditional sequencer by any means, but fun to play with none the less. I have created some really cool rhythmic and ambient sounds using this tool.

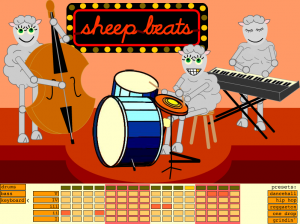
5. Sheep Beats

  • again, just for fun. Guide a band of sheep to pop music nirvana!

Feel free to post any others you know. Hope you enjoy these online goodies!

The Role of the Artist, Engineer, and Producer

Welcome!

This is my first blog post. Ever.

Over the next couple weeks I will undoubtedly get a feeling for how this works and the best way to go about it. Before we get into the more technical, creative, and experimental aspects of the recording process, it makes sense to start at the very beginning.

But where is the beginning? How can you start talking about such a diverse topic? History might be a logical start, and that will come in the near future.

I think it is important to clarify a few things here to start. As you can imagine, the recording process is diverse and varies greatly from session to session. Generally speaking, there are the same core group of people involved in the recording process. These are: the artist, the engineer, and the producer.

The role of the artist is pretty clear – they are the performers, the songwriters, the arrangers. They have crafted their songs to perfection, having scored all the music and written all the lyrics. Then the engineer is the one who captures this performance. They are armed with knowledge of operating all the sound equipment available to them, and they are skilled at pushing the record button at the exact right time. So this must mean the producer is the one who organizes all this madness, and oversees the entire process. Right?

Yes. Well, maybe. But actually, no. This is what I thought before I had any real experience in this field, as an outsider. Years of watching Mtv and Behind the Music specials had led me to this simple conclusion. It is not necessarily wrong, it is just over simplified and sort of ignorant.

Here is what I have learned about these positions over the past years:

Artist: there are many different types of artists. Singer songwriter, pop star, rock and roll band, multi-instrumentalists, non-instrumentalists, lyricist, people who can’t sing in tune, etc. The truth is, their role varies greatly depending on the genre and type of record they are working on. In today’s industry, it seems that it is more common for an artist to be the songwriter (this is especially true for indie bands). However, back in the heyday of rock n roll, many of the most famous stars did not compose their own music or words. It was often done for them by songwriters. Pat Boone was not (and still isn’t) a respected songwriter – he is a good at performing other peoples songs. Many famous pop stars today still use this approach. From Rihanna to the Jonas Brothers, they simply interpret and perform songs that have been specifically written for them by experienced song writers. Contrary to this, bands that perform in any of the rock subgenera usually compose their own material.

Engineer: “sound engineer”, “audio engineer”, “sound technician”, “the tone-master” – these terms are all fairly ambiguous and refer to someone working in music production. I like “sound technician” the best, as it summarizes the role quite well. Engineers work on the technical side of the recording process; they are skilled with the use of the machinery and equipment for the reproduction of sound. Responsibilities include placing of microphones, patching outboard gear, setting levels, and turning a lot of knobs. There are many different types of engineers in the professional audio world, and often these responsibilities are spread out among different people. Some of these include tracking engineer, mixing engineer, mastering engineer, audio post engineer (sound for film), live sound engineer, etc (these terms will be discussed in more detail in a future post).

Producer: for me, the role of a producer was the most difficult of the three to grasp. Basically, the producer is the one who ties everything together. Traditionally, they have overseen and managed the project. Again, this role varies from project to project, but often includes working with the artist to gather songs and ideas for a record, select musicians and songs, and most importantly, coaching the artist and accompanying musicians to obtain the best performance. In my experience, the producer many times will work closely with an engineer they trust to fulfill the certain sound ideas they have envisioned. An interesting note here is the contemporary producer, especially when working with hip hop artists. While the artist usually comes up with their own lyrics, the producer many times provides the beat for the performer to work with. Other duties may include financial negotiations, budgeting the project, and making sure things stay on schedule. Again, I think the most important aspect of being a producer is upholding the quality and integrity of a project.

As you can tell by these short descriptions, the definition of these different positions in the recording process is not always clear cut and can easily vary from project to project. For example, many electronic artists perform all three jobs at once, while hugely successful pop acts may have an executive producer, music producer, four engineers, and a whole series of studio musicians working with them. If nothing else, this shows that the recording process is open for personal interpretation and highly variable.